

TakeOffLink / 7 min
Place fixed-size ACM panels
Choose actual panel dimensions and build a saved panel schedule on the elevation.
Example project: Cedar Pavilion. Fictional drawings, actual product interface. Tutorial steps describe the intended workflow; complete project acceptance remains under review.
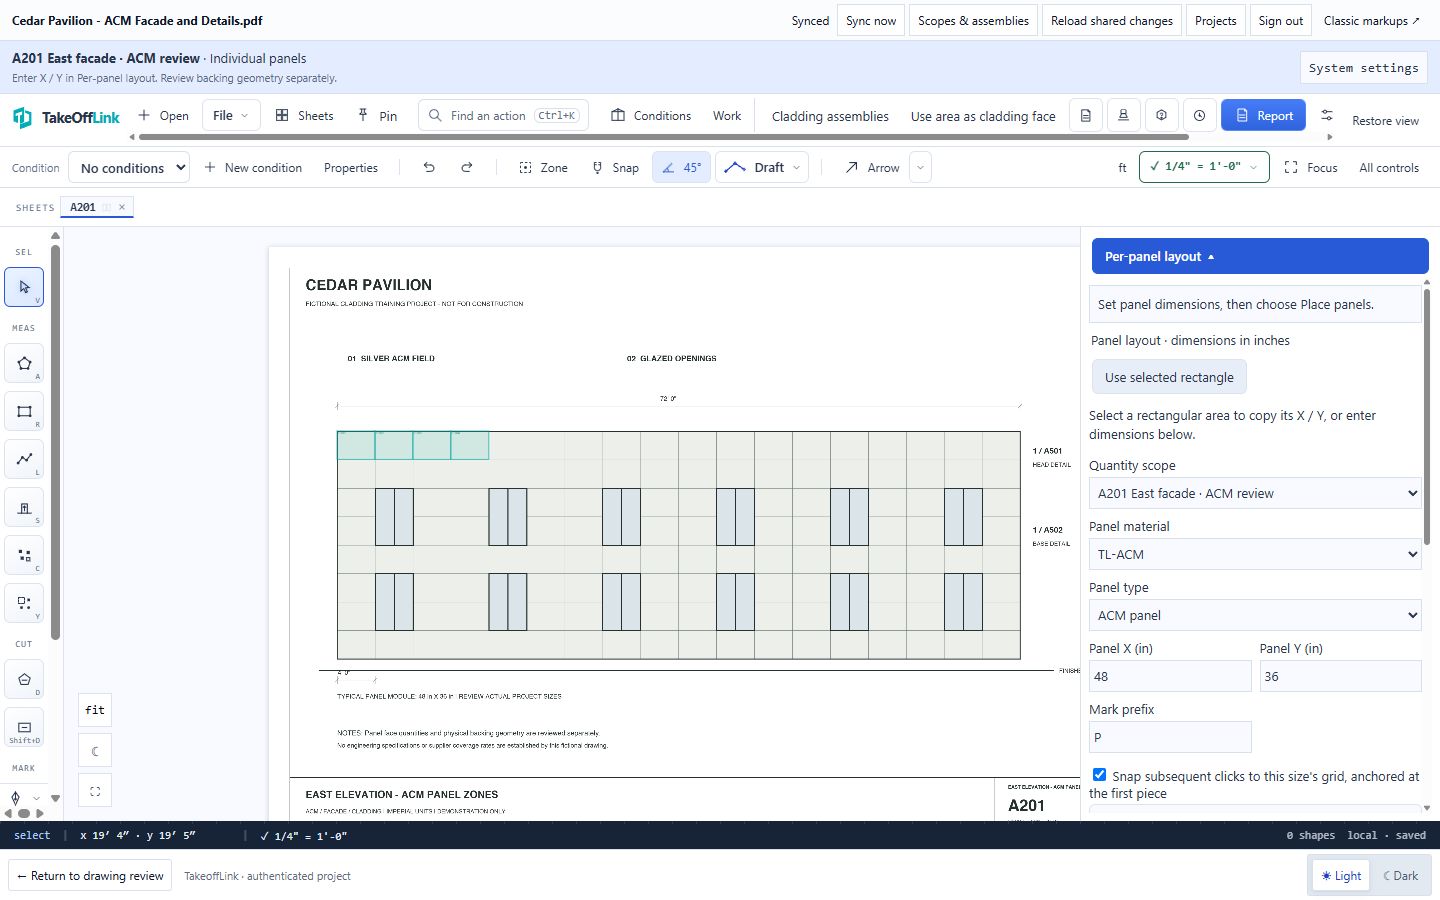
Choose the saved scope
Open Per-panel layout and select the scope and panel material. Use ACM panel for finished ACM rectangles or Profile panel for effective coverage.
Enter X and Y
Enter dimensions in inches. A selected calibrated, axis-aligned rectangle can supply editable X/Y; irregular or rotated shapes cannot supply guessed sizes.
Start and stop placing
For Cedar Pavilion, use 48 x 36 inch pieces along the first full-panel row above the windows. Align the first upper-left corner to a drawing joint, then use the size grid for adjacent pieces. Check the drawn joints and openings before each placement; partial pieces need their actual dimensions. Use Stop placing when done. The P key is not a placement shortcut.
Review the schedule
Check marks, dimensions, material and quantities. Use the panel schedule to edit pieces. Preserve the elevation boundary and openings as separate geometry for backing.
The panel cutlist agrees with the pieces you placed. Panel SF does not silently become backing geometry.